| Portal |
 Help Help
 Search Search
 Members Members
 Calendar Calendar
|
| Welcome Guest ( Log In | Register ) | Resend Validation Email |
 NFS Police H.Q. Forums -> Need for Speed, Grand Theft Auto, & Midtown Madness Editing, Tutorial, & Requests Forums -> F.A.Q.'s & Tutorials -> NFS Tutorials
   |
| AJ_Lethal |
Posted: Sep 14 2013, 12:53 PM

|
 VIP  Group: Members Posts: 57 Member No.: 61 Joined: Sep 14 2013 |
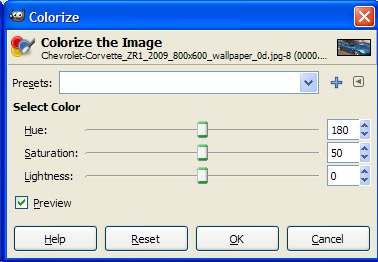
OK, so you've got a gorgeusly modelled/converted car, with gorgeous textures, melodic custom engine sounds, a painfully accurate performance and showroom data. But there's something missing, right? NFSHS cars generally have a nice "videowall" (or vidwall, for short) of the car. Normally you just would take a photo of your car and shoehorn it into the new vidwall file, right? Step 1: Say hi to GIMP The first time you fire up GIMP, it would look like this: 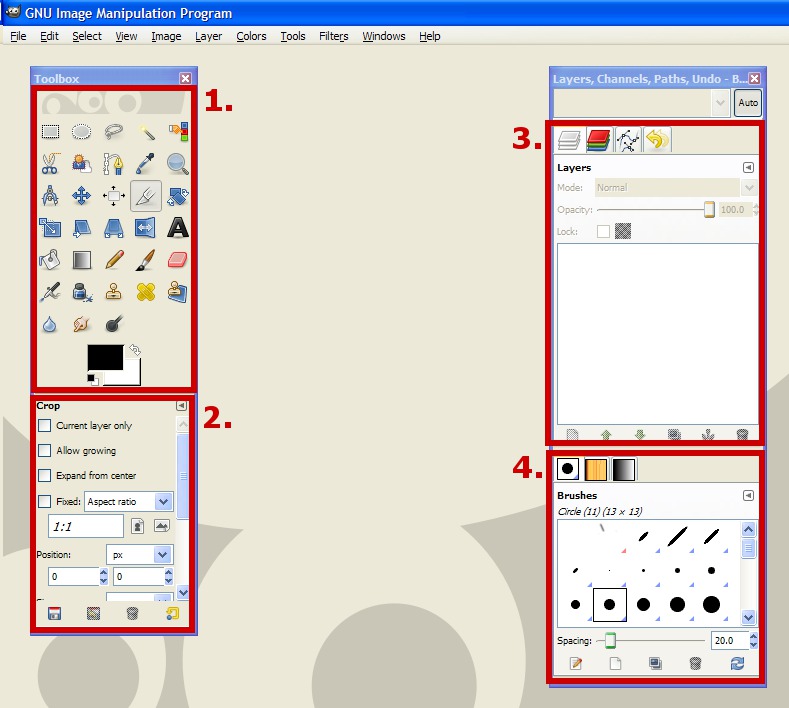 I usually reduce lightness by 10-25, depending of the image (to reduce contrast a bit in certain images). Go to Color > Brightness and Contrast, reduce brightness by 20-35 and raise contrast by the same amount, then hit OK. Then, go to Filters > Blur > Motion Blur. Set the length to 7 and set the angle in such a way the blur runs in the same direction the car is "pointing" at (at 0 degrees, the blur is completely horizontal from right to left, at 45 degrees the blur runs diagonally from right to left, at 90 degrees, the blur runs vertically from the bottom to the top. From 90 degrees onwards, the order and direction is inverted... to not make things way too complicated, I will try to put it in a diagram:  [/CENTER] [/CENTER]You can use the Compass tool (Shift+M) to measure the angle (do it from the front end of the car). Depending of the direction the car is pointing at and/or the car angle you have to add/substract 90/180/270/360 from the angle you will get from the tool. Now select the Rectangle Selection tool (R), check the Rounded Corners checkbox and set the radius to 15. Now select the image from corner to corner (make sure there are not gaps at the sides), hit Ctrl+I to invert the selection (so you will only have the corners selected) and delete it. You should have something like this: 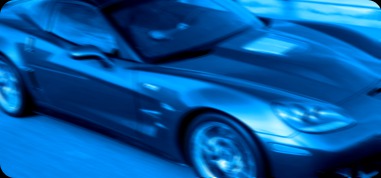 That's it for the opponent vidwall. Now save it (or export it, if you're using GIMP 2.8). Select Flatten the Image, click on "Export" and "Save" when prompted. Now it's time to make the player's car vidwall (the one with the manufacturer logo) Get a suitable logo image (high resolution, white background) and open it in GIMP. Use the Fuzzy Select tool, adjust the threshold to around 50-100 and select all the blank spaces. Then, invert the selection (Ctrl+I) and copy the selection. If you find a png of the logo it's even better since you can skip the Fuzzy Select step and copy/paste straight away. Paste it in the vidwall image as a layer (Edit > Paste as > New Layer), auto-crop the layer (Layer > Autocrop Layer) and then scale it to either 320px width or 150px height (depending of the logo). Then use the Alignment Tool (Q) to align the layers (click on the background, then Shift+click on the logo and align it to the center with the buttons in the tool options dialog) Go to Colors > Colorize and adjust the hue value as the same you used the last time, but set the saturation to 50-75 and hit OK. Then go to Layer > Transparency > Alpha To Selection, create a new layer (Ctrl+Shift+N), place the new layer below the logo one, and go to Select > Grow Selection. Set a value of 5 pixels and hit OK. Use the Bucket Fill tool (Shift+  and paint it with black. That will be the logo shadow. and paint it with black. That will be the logo shadow.Now deselect your selection (Ctrl+Shift+A) go to Filters > Blur > Gaussian Blur and set it to 10. Go back to the logo layer, change the layer to mode to either Screen, Dodge, Addition, Soft Light, Hard Light or Grain Merge (whatever you think it looks best). Go to Layer > Transparency > Alpha To Selection, get back to the shadow layer and delete the selected part. Then set the layer opacity to 90-95. You gotta have something like this (using Screen layer mode on the logo):  Now save/export the image as 0001.bmp as described before. It's time to compile the file. Step 3: Recompiling the file Just drag the index.fsh file to the fshtool executable and that's it. Your vidwall is ready to use! Additional notes This procedure can be used with the showroom vidwalls (xxxx1.qfs, xxxx2.qfs, where xxxx is the car ID), but you would like to put the rounded corners as a separate layer to make editing easier. -------------------- |
   

|
| AJ_Lethal |
Posted: Aug 28 2017, 10:13 AM
|
|
VIP Group: Members Posts: 57 Member No.: 61 Joined: Sep 14 2013 |
Updated tutorial (improved method)
-------------------- |
|
|
0 User(s) are reading this topic (0 Guests and 0 Anonymous Users)
0 Members:
 |
|
|
|
Copyright © 2013 NFS Police H.Q. All rights reserved.